Creativity for a Cause

Creativity for a Cause
Stampin' Up! is a global sponsor for the Ronald McDonald House Charities. As the assistant lead for Stampin' Up! at the Tampa, FL location, I provide the House with hand-stamped cards for families to use during their stay. Contact me to help me create cards for this worthwhile cause.
Showing posts with label Cards. Show all posts

Sunday, December 15, 2013

Let there be peace on Earth

 Peace, if you think about it, comes in may ways.  Peace in your home, peace in your health and peace in your heart.   The dove has always been symbolic of peace. 

 I threaded the button with a piece of the Burlap Ribbon that I shredded and tied the knot to the back and attached it with a glue dot.
I cut two pieces of ribbon. One is 6" long and it mounted it to the Crumb Cake layer of the card, after it was embossed.  Another piece, 5" long was then tied UNDER the first piece.  Tie tightly so it stays in place.  By cutting two pieces of ribbon, versus one that goes all the way around the inside of the card, you will save yourself about 6" on every card. 

Make It Supplies:
  •  Stamp Set: Calm Christmas
  • Cardstock: Soft Suede, Crumb Cake, Very Vanilla
  • Ink Pads: Crumb Cake, Soft Suede
  • Big Shot: Pretty Print Embossing Folder #132175
  • Accessories: Victoria 5/8" Crochet Trim Ribbon #118481, Burlap Ribbon #132140, Very Vintage Buttons #129327, Distress Tool #127562, Dimensionals, Glue Dots

Subscribe to my FREE weekly newsletter for tips, creative inspiration, promotional items and event information.  


http://www.stampinup.net/esuite/home/lisacurcio/contactme

Thursday, December 12, 2013

All Wrapped Up!


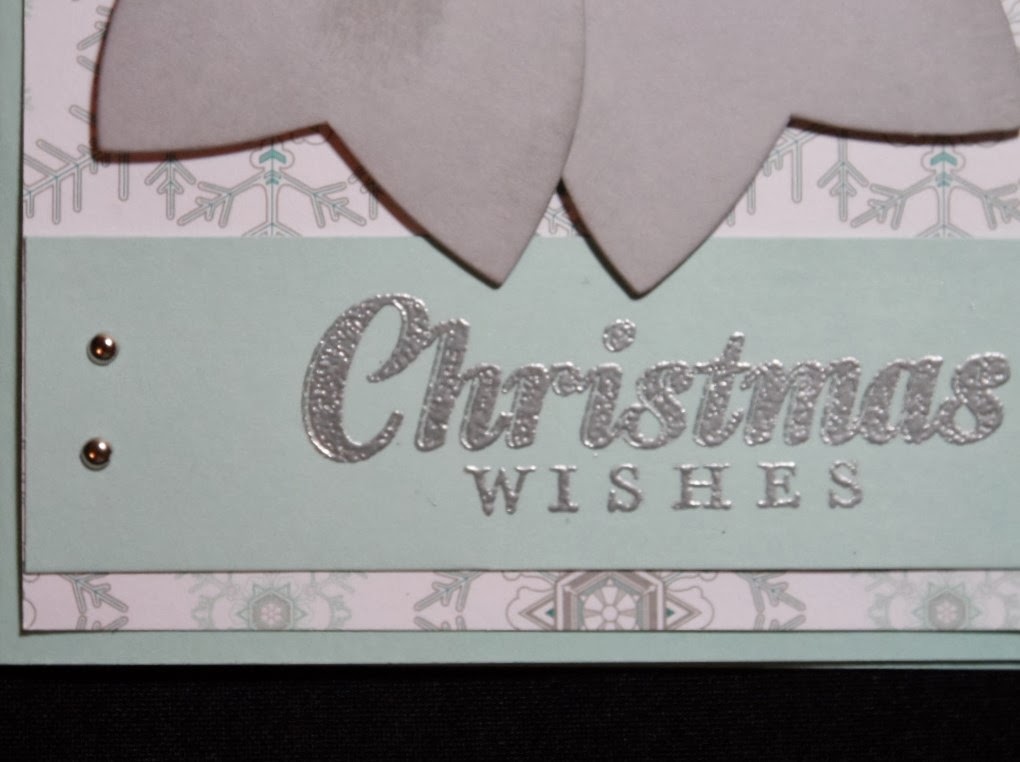
By now lots of you have your Christmas shopping underway. I love gift giving but I love wrapping the gifts just as much as buying them.  I love making the outside looks special - just like the person I'm giving the gift to.  This card is a tribute to packaging!

I used the Gift Bow Die (hurry, we have not been told it's being carried over after January 2nd!).  I love this die because it makes 3 different bows. Here I've used the small bow, there's a larger bow and you can double up the two sizes for an awesome double bow, too! 
 I sponged the edges of the cardstock for dimension an heat embossed the words with silver.  I played up the silver embossing powder by adding two mini silver brads as well. 
I added silver glimmer paper for the center of the bow which adds that extra sparkle.  

Make It Supplies:
  • Stamp Set: Joy to the World #131796 wood, #131799 clear
  • Cardstock: Pool Party, Smoky Slate
  • Ink Pads: Metallic Silver Encore #132142, Smoky Slate
  • Designer Paper:  Winter Frost Paper Stack #132183
  • Big Shot: Gift Bow Die #129977
  • Tools:  Heat Tool #129052, Silver Emboss Powder #109131, Embossing Buddy #103083
  • Accessories:  Mini Silver Brads #122941, Piercing Tool, Pierce Mat, Bone Folder, Stamping Sponges, Dimensionals, Glue Dots
Subscribe to my FREE weekly newsletter for tips, creative inspiration, promotional items and event information.  
http://www.stampinup.net/esuite/home/lisacurcio/contactme


Sunday, December 8, 2013

Frozen Tundra Project

 Some of you might remember that I spent 5 wonderful days in Northern Ohio and Pennsylvania with my dear friend, and sister stamper, Linda Bauwin.  During that visit, Linda hosted a weekend stamping retreat.  I dubbed my trip the "Frozen Tundra" because it was SO COLD! 

SPOILER ALERT!

I just booked a venue to host my first, all day stamping retreat. It will be at Cedarkirk Camp in Lithia, Florida on Saturday, March 15th.  Mark your calendar now so you won't miss the fun!  
Details will be coming soon!

This is one of the fabulous projects Linda provided during the weekend retreat. We used the Decorative Window Gift Boxes (page 36 of the Holiday Catalog) and filled them with five (5) 3"x3" note cards and envelopes. 

These boxes are 1 1/2"x4"x4" and they come 6 in a package for only $4.95.  I don't know about you, but I love a DEAL this time of year!  These boxes are definitely a deal!  They are food safe and the perfect size for homemade cookies, ornaments and much more!  CLICK HERE to order yours!

 Make It Supplies:
  • Stamp Set: Festive Flurry Bundle (includes the stamp set and the coordinating Framelits) #133284 wood, #133285 clear
  • Cardstock: Pool Party, Coastal Cabana, Whisper White
  • Ink Pads: Coastal Cabana
  • Big Shot: Gift Bow Die #129977
  • Foil Sheets: Silver #132178
  • Envelopes: Square #107309
  • Designer Paper: Winter Frost #132341
  • Glimmer Paper: Silver #124005
  • Accessories: Frosted Finishes Embellishments #132150, Dimensionals, Rhinestone Basic Jewels, Silver Ribbon 1/8" #132137
Subscribe to my FREE weekly newsletter for tips, creative inspiration, promotional items and event information.  
http://www.stampinup.net/esuite/home/lisacurcio/contactme


Wednesday, December 4, 2013

Which way?

 Today's card is a follow up from my card on Sunday.  If you missed it, CLICK HERE.  During that blog post I shared how I created this grid technique which gives the illusion of layers on the card front. It's simple and requires a few post-it-notes.  Give it a try!  CLICK HERE for the video tutorial.
I used three colors to do the sponging and stamping.  Keeping with my 'arrow' theme I used one of the Hung Up Cute Clip (they come in three assorted designs; arros, hanger & a thought bubble) to focal point my greeting banner.  

Make It Supplies:
  • Stamp Sets: Hello Lovely #130240 wood, #130243 clear; Off the Grid #130736 wood only
  • Cardstock: Pistachio Pudding, Whisper White
  • Ink Pads: Soft Sky, Tempting Turquoise, Pistachio Pudding
  • Accessories: Stamping Sponges #101610, Hung Up Cute Clips #129389, Soft Sky Seam Binding #131210, Dimensionals
Subscribe to my FREE weekly newsletter for tips, creative inspiration, promotional items and event information.  
http://www.stampinup.net/esuite/home/lisacurcio/contactme
 

Tuesday, December 3, 2013

Bloomin' Beautiful Birthday

 This over-sized crinkled flower is the focal point for this card.  Naturally,  card this size can't be mailed without extra postage but I'm intending to attach it to a gift and hand deliver it. 

The soft tones of the Crisp Cantaloupe and the bold neutral of the Basic Gray allow these two colors to really make a statement.
 You can easily make these 3D flower. I have a video teaching you how. CLICK HERE to learn.
I stamped the sentiment directly on the designer paper.  I added some pearls to lend credence to the texture of this card and play up the vintage feel. 

Make It Supplies:
  • Stamp Set: Perfectly Penned #128703 wood, #122892 clear
  • Cardstock: Basic Gray, Crisp Cantaloupe
  • Ink Pad: Basic Gray
  • Designer Paper: Venetian Romance #130144
  • Punch: 2 3/8" Scallop Circle #118874, Scallop Edge Border #119882, 1/16" hand-help (used to make the small holes behind the crinkled flower and on the bottom border. Best viewed in the first photo.  This punch is now retired)
  • Ribbon: 5/8" Crochet Victoria Trim #118481
  • Accessories: Pearls Basic Jewels #119247, Glue Dots, 1/8" Mini Brads #122941
Subscribe to my FREE weekly newsletter for tips, creative inspiration, promotional items and event information. 
http://www.stampinup.net/esuite/home/lisacurcio/contactme